I first made this project over twenty years ago in grade school and was thinking about it recently. It's easy, fun, and a great way to finish up old and broken crayons. This project also inspired me to make some stained glass sugar cookies.
Supplies
You will need:
- crayons
- crayon sharpener
- wax paper
- cardboard or other protection
- black construction paper or cardstock
- iron
- paper towels
- glue
- exacto knife
Instructions
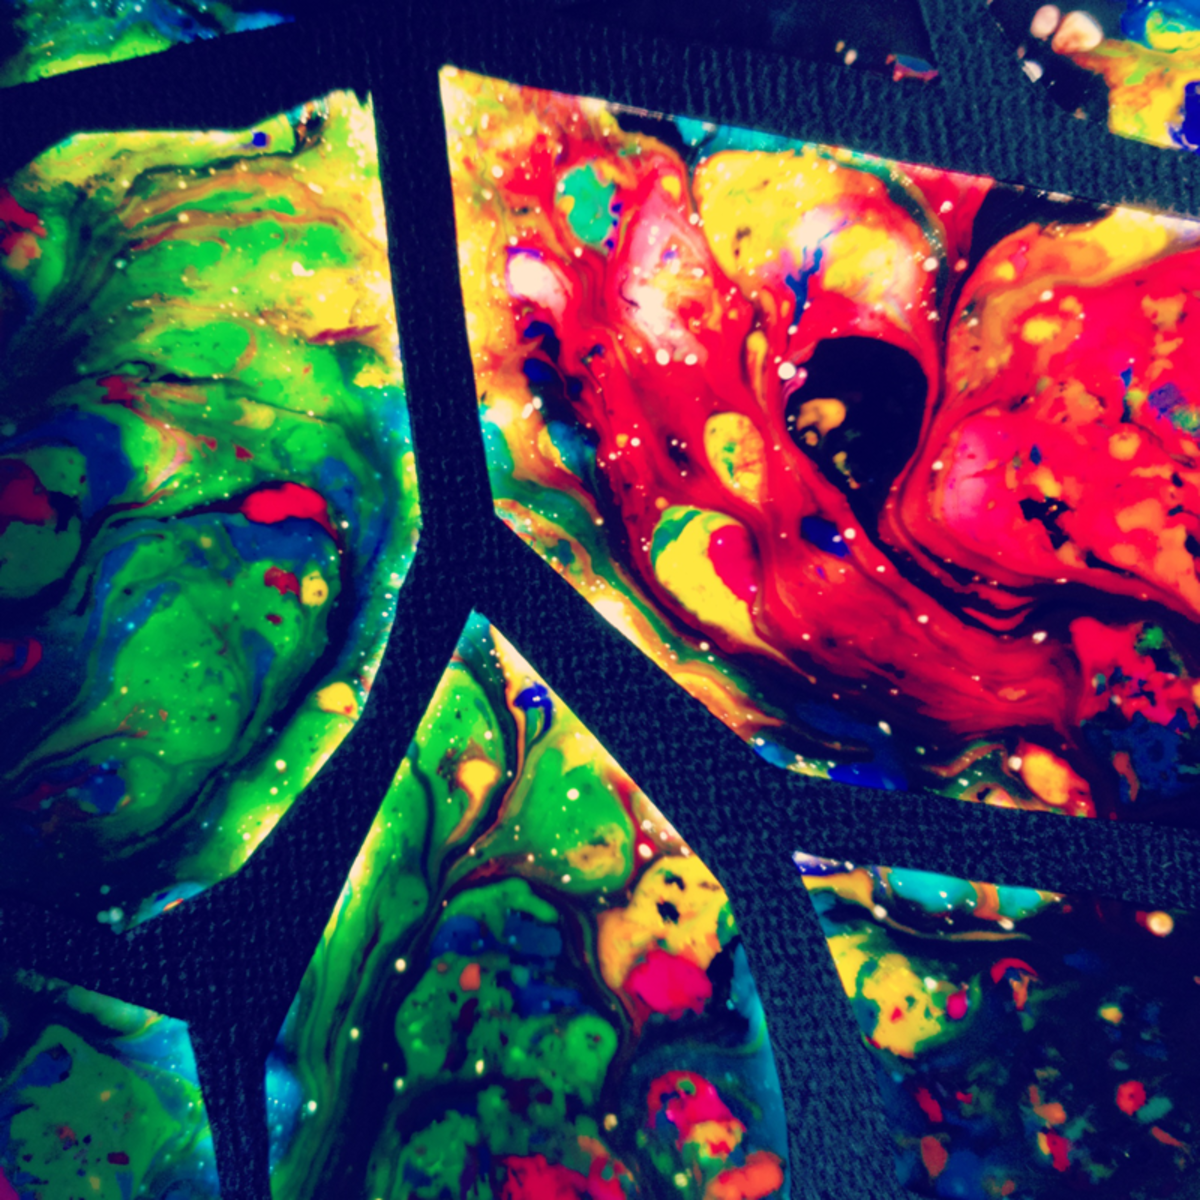
1. Use a white or light-colored crayon/colored pencil to draw your design on the back of your black paper. I used cardstock with a shiny side, so the dull side was my "back." Otherwise, skip this step if you wish to freehand. I have done both ways.
2. Using an exacto knife, cut out your design. Be sure to leave a border around anything you cut to keep your "window" intact. Use your lines/drawing as a guide and cut inside and outside of the lines, but not on them. You're essentially cutting out a stencil.
3. Spray the "back side" of your black window stencil paper with spray glue (I use Aleene's tacky spray glue and I swear by the stuff. You can find it at Michael's).
4. Tear a piece of wax paper off the roll a little larger than your stained glass window stencil. Carefully place wax paper on your stencil or your stencil on your wax paper, whichever is easier for you. Place waxpaper side up and smooth down with hands.

5. Keep your art waxpaper side up to use as a template. If you haven't yet, protect your work area. make sure cardboard or a few layers of newspaper are between your work surface and your art. The crayons will bleed through the waxpaper, believe me. Begin sharpening your crayons. I have since lost my prized crayon sharpener from my childhood and forgot to buy one for this project so I carefully used my chopping knife. Avoid crayon chunks, they need to be shavings/crumbs, or they won't melt evenly/properly.
6. When satisfied with crayon coverage, place a second piece of waxpaper on top. Your crayon shavings should be sandwiched between two pieces of waxpaper at this point, with your black stencil as the very bottom layer and is facing the surface you're working on.
7. Place a paper towel or two on top of your project and begin ironing. The paper towel is protecting your iron from getting melted wax on it, as the wax paper can bleed. Do a section at a time, peeking under your paper towel to ensure everything is melting the way you want it to. Too much heat for too long will cause the colors to mud together. Too much pressure and movement with the iron will also cause your colors to swirl, but too much will turn your design from colorful to muddy. Pay attention and take your time.
8. When crayons are melted to your liking, allow to cool for a minute. Using an exacto knife again, trim the excess wax paper away from the black edges. If your papers are separating from each other and the melted wax, simply use the tip of the iron and your paper towel to re-melt/seal the edges. Make sure you're applying heat to only the edges or you'll melt more of your image and might accidentally ruin it.
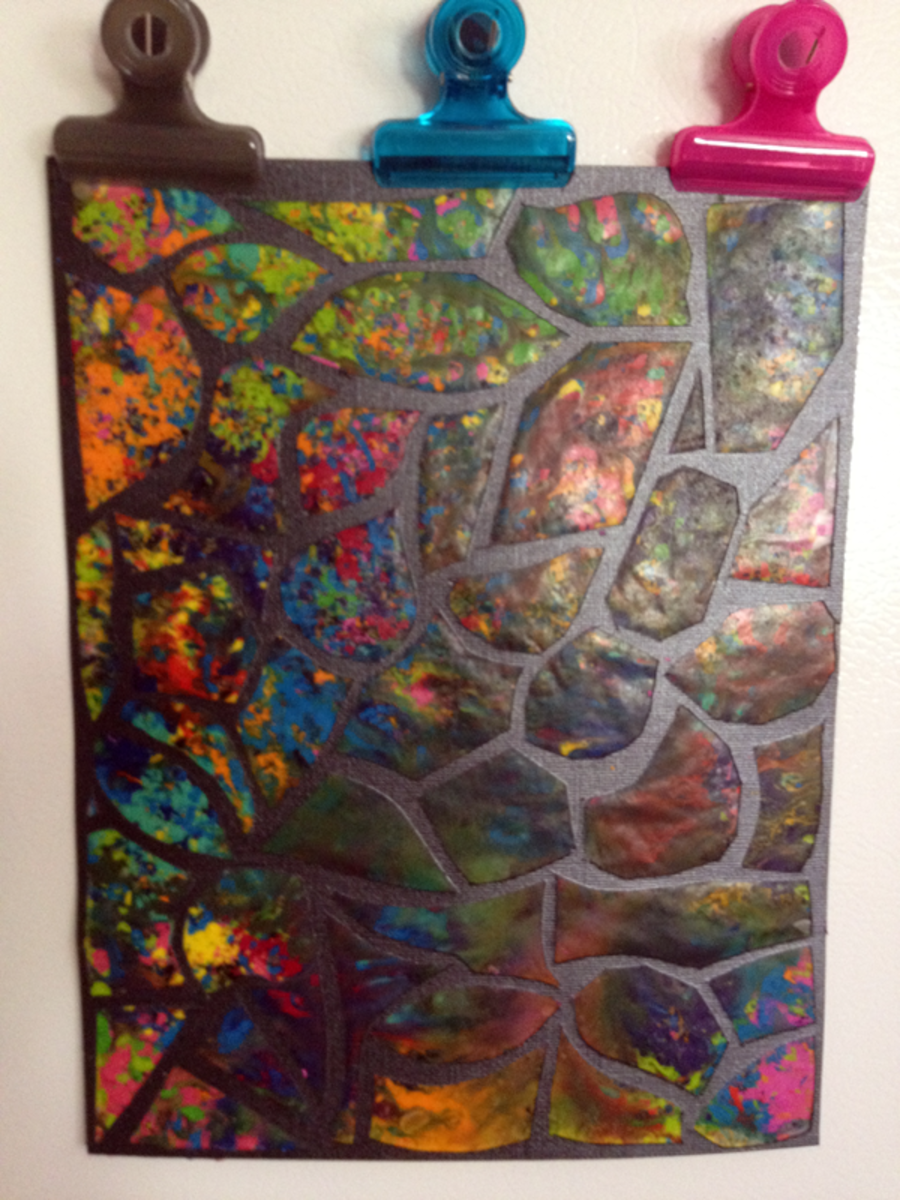
9. All done! Hang as frig art or window art. If you really love it, frame it in a double glass frame which will allow light to come through the back and hang it somewhere bright. Enjoy!
Heather Says: This is still a fun project 20 years later. Please be careful using your iron and knife. Use this project to create multiple panels (or a large panel) to use in a window. Finish edges with black tape if using in sunny/hot windows to keep wax from melting out.
No comments:
Post a Comment